Mastodon

Adventures in retro gaming: NES in Mednafen on Ubuntu

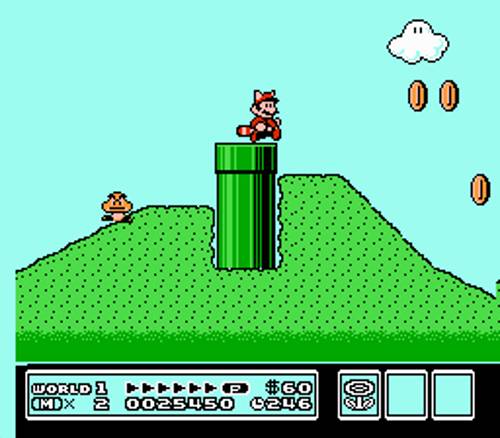
Mednafen running Super Mario 3

Every once in a while I get an urge to revisit some of the cookie fueled nights of gaming that I remember so well from my early teens. The actual games are easy enough to find, a google search for “nes roms” will turn up all your sentimental favourites. The big question is how to play them.

I worked this out once on windows but found the most common program (GFCEU) for playing ROMS on Ubuntu really aggravating. Aggravating and crashy. A little digging turned up an alternative called “Mednafen”. Happily its already in the repositories and can be installed with the command:

mike@sleepycat:~$ sudo aptitude install mednafen

Its a command line program and the manual for it is pretty terrible, the helpfile isn’t helpful and their website isn’t much better. It fact it doesn’t have much going for it other than the fact that its a really good emulator.

Since the documentation seems to only offer two levels of detail (“none” and “everything but with out explaining what anything is”) here is what worked for me.

Getting it going is as easy as pointing it to one of your existing ROMS:

mike@sleepycat:~$ mednafen Desktop/NESgames/Mario3.nes

Assuming you like the default keyboard layout thats really all that needs to happen.

My difficulties came from my strong dislike of the default keyboard keys chosen for up,down,left and right as well as not finding any keys at all that operated the A or B buttons. You can set the buttons you care about by passing them as parameters on the command line but that really seemed like more trouble than it was worth so I edited the config file directly.

Open the file ~/.mednafen/mednafen.cfg in something like gedit and do a search for “;nes, Port 1, Gamepad: A ”.

Initially I thought I could put the letter “Q” or whatever I wanted beside the correct option and that would be that. When I realised they wanted “keyboard 107” as a value, was at a bit of a loss about how to find those keycodes. It turns out that its really easy to get them with a little program called showkey which is already included in Ubuntu.

mike@sleepycat:~$ showkey -a

Press any keys – Ctrl-D will terminate this program

a 97 0141 0x61

s 115 0163 0x73

d 100 0144 0x64

f 102 0146 0x66

g 103 0147 0x67

^D 4 0004 0x04

Quoth the man page “showkey prints to the standard output the decimal, octal, and hexadecimal value(s) of the key pressed, according to he present keymap.” Its the first (decimal) value that is needed for the mednafen config file. Use showkey to figure out the the key numbers you want and then add them to the config file like this:

;nes, Port 1, Gamepad: A

nes.input.port1.gamepad.a keyboard 44

The only other config option I was interested in was the fullscreen mode:

;Enable fullscreen mode.

fs 1

I have to say that I don’t mind the fact that Mednafen is command line only. It seems to do a great job playing the games and seems very stable. Getting it set up the first time is a bit of an adventure, but once its set up you don’t need to fool with it any more and can get down to a little 8 bit gaming mayhem. Which is exactly what I am going to do now…

;Enable fullscreen mode.

fs 1
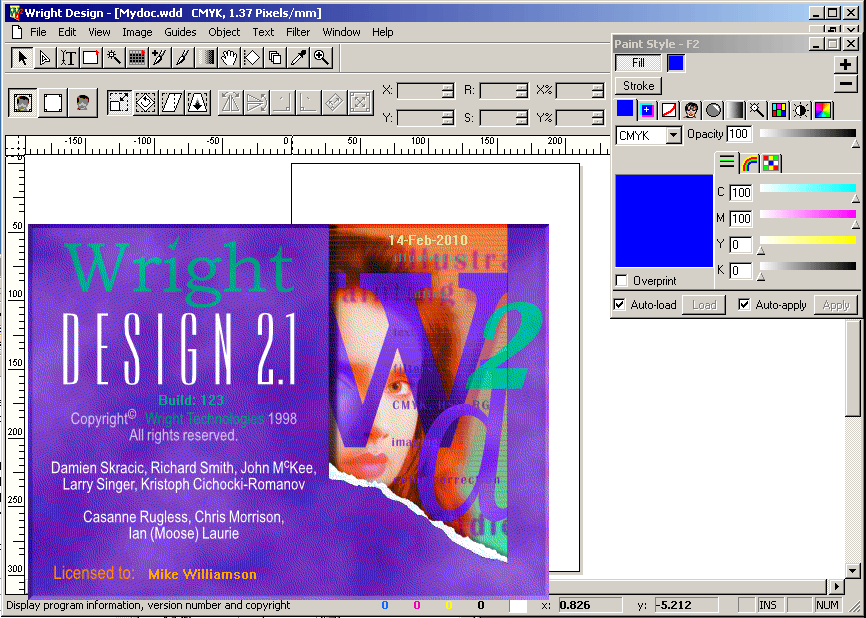
12 years old and still the future of design.

Flashback 12 years.
Its 1998, and I am working for a photographer, scanning negatives and doing image manipulation with the (then) new Photoshop 5.
While reading some graphic design magazine my boss stumbled across a review of a revolutionary new program that promised to shake up the graphics world. (You can still find reviews for it that give you a sense of how big a deal it was. Like this one.)

The review explained how Wright Design, brainchild of Australian company Wright Technologies, combined both vector and bitmap graphics and pagelayout software into a single blazing fast image editing package. I remember them mentioning Wright Design was able to do with a single processor what Photoshop struggled to do with two. Interested predominately in the speed (since I was using an NT4 workstation that is probably less powerful that an iPhone) my boss found the Canadian office of Wright Technologies, and using whatever clout being the Canadian AGFA rep gave him, got himself into the Wright Design beta program.
Shortly thereafter I found a Wright Design 2.1 Beta CD on my desk with a note to try it out. (You can try it out yourself below)

Try it I did, and was impressed. Suddenly the division between vector and bitmap editing drawn by Adobe seemed strange and artificial. The speed was exactly what the reviewer had said, fast fast fast.
After getting some pretty strange output from some RGB to CMYK conversions in Wright, my boss heckled the company and got me a phone number of someone in the company who I could ask questions to.
A little starstruck to be talking to a real programmer in a highflying tech company, I would always pad my conversations about CMYK conversions with questions about the tech industry. It seemed that he was pretty happy to share the industry gossip and gave me a glimpse of what was going on for the company.

He explained that at some now forgotten tradeshow John Warnock himself had come up to the Wright Technologies booth and asked for a demo. They happily demoed the program and John apparently stood there for two or three hours peppering them with questions about how it did what it did.

Soon after the trade show, he told me, an invitation arrived to demo Wright Design at an advanced Photoshop users group. John introduced the demo and apparently joked that Wright Design was what they planned for Photoshop 11.
Not long after he told me that, Adobe came out with InDesign which looked like had been aimed squarely at replaceing Wright Design. It pretty much killed Wright’s toehold in the marketplace. Suddenly after it became difficult to reach my programmer friend and I realised that Wright had closed its Canadian office. I turned my attention back to Photoshop but still used Wright Design here and there for my personal projects. As time went on I would check in on Wright and see if there was an new version out there but there never was. Where I could find the program being sold at all, I watched the price slowly sink from around $800 to $99 on some cut rate third party site.

Clearly the company was on its last legs and sadly had no wish to bestow immortality on its product by following the lead of Netscape. (If someone out there has the source code somewhere, it would make one hell of a Free software project. I would love to make that happen…).

The end finally came in 2002 when they folded up and sold their IP to Microsoft and IBM for $2 million.
Here we are, 2010. The real Photoshop 11 has arrived, and, though it brought some big improvements the barriers between vector and bitmap images might be lower, but are still very much intact and its still a brutal resource hog. Though there is plenty wrong with Wright Design, its fascinating to think where it (and the industry) would be today had its development continued.

So here, in a fit of nostalgia brought about by finding some old “.wdd” files amongst my cherished backups, is my tribute to Wright Design. It was the future 12 years ago, and in my opinion, still is, after all these years.

Download Wright Design and try it out yourself. Tell me what you think.The serial number is included in the zip file.

You may need to run it in an older version of Windows inside a virtual machine.

Disclaimer: I am not a lawyer, but as far as I can tell this software is abandonware. I am including it here with the serial number and the original tutorials (and files) to allow people to study this software. Contact me if you have a problem with this.

wright_design

There were also a series of tutorials included on the CD:

Project1.pdf Tutorial1.zip (includes images used in tutorial)

Project2.pdf Tutorial2.zip (includes images used in tutorial)

Project3.pdf Tutorial3.zip (includes images used in tutorial)

Wrong side of the tracks: Rails on Ubuntu

Ever noticed that all the Ruby on Rails people seem to be “Mac people”? DHH and Ryan Bates (Rails casts), the guy from Peepcode all spring to mind. My boss and every other person that I have met that works in Rails, all do it on a Mac.

Well it might not have the sex appeal of the Mac, but Ubuntu is an amazing development platform and runs Ruby on Rails perfectly. My only real gripe with it, is that its a pain keeping up with their release cycle. Six months goes by really fast, and every time I install the latest version of Ubuntu,  I have to set up Rails again (I’m not one for upgrades, clean installs are the way to go).

Last time I decided that enough was enough. I wrote a setup script that installs everything needed for Rails development in one go.

I’ve used it a few times since then and its already saved me hours of setup time so I thought I would make it available.  So here you go world, even though this might be the slightly ghetto way to develop in Rails, it just got a little easier.

You can find it on github: http://github.com/sleepycat/wrong-side-of-the-tracks

Editing JNLP files – gotcha!

I have been playing with some JavaFX stuff for a little while now and finally gotten to the point where I am trying to deploy my first program. I was a little naive inn thinking this was going to be an easy process and have been forced to have a good hard look at jnlp files. It turns out that most of your apps deployment options are controlled by editing the XML in that file. After a little reading about the different fields I set to tweaking them to see if I could get the effect I was looking for. After making my changes I crossed my fingers and relaunched my app.

No change.

Check my syntax,

No change.

Try some variations.

No change.

No change.

No change.

Try to effect any change whatsoever by editing fields I know are working like <vendor>Mike Williamson</vendor>.

No change.

A little poking around reveals that Java is thoughtfully caching the jnlp file and has been totally ignoring all my changes since the first time I loaded the app. Thanks Java. I’ll appreciate that someday.

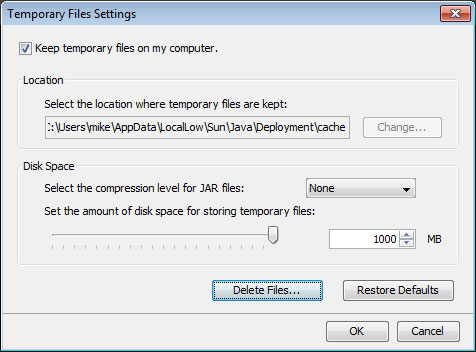
Under windows go to Control Panel > Programs and open the java control panel. Under Temporary Files settings click “delete files” as shown below and suddenly everything works. Yay!

clearing-java-cache

Setting up terminal windows for Rails development

Even though Netbeans make things like the Rails development log and the database connections pretty easy to get to, I still have a pretty strong preference for the command line. When I am coding I almost always have a few terminal windows open and stretched nice and big; generally one for mysql, one for the Rails development log and often a third for the Rails console in case I want to experiment with the code I am writing.

The down side to this set up is just that; the set up. Every day I type in the same stuff… mysql -u root blah blah blah.

So last night, after an ill advised post dinner coffee, I set about scripting my morning Rails ritual and on the way learned a bunch about the terminal.

Gnome terminal is the proper name for the program that resides under Applications > Accessories > Terminal. A quick look at the man pages give a pretty nice set of options to play with but I found they required a bit of trial and error to get right.

Cut and paste the ones you want into custom launchers.

Launching Mysql and getting a prompt on a specified database:

gnome-terminal  -e “mysql -u root -ppassword -D myapp_development”

Thats no typo! There can’t be any space between the -p option above and the actual password!

Launching a window with the Rails development log (with a specified Rail environment):

gnome-terminal  –working-directory=/home/mike/projects/myapp -e “script/server -e mikes”

That one is great for me because I am rapidly becoming sick of typing in stuff for custom Rails environments. Now I don’t need to!

Those are pretty fun, but the ultimate in convenience for me would be to have a single tabbed terminal window with everything. So why not combine the two into a single command?

gnome-terminal –geometry=174×46+50+50 –tab-with-profile=Default –title=”Mysql” -e “mysql -u root -ppassword -D myapp_development” –tab-with-profile=Default –working-directory=/home/mike/projects/myapp –title=”Server” -e “script/server -e mikes” –tab-with-profile=Default –working-directory=/home/mike/projects/myapp –title=”Console” -e “script/console mikes”

This is a doozie but it means that my whole morning Rails set up ritual has been reduced to a single click on a launcher. Sweet!

Missing images in JavaFX on Ubuntu Karmic

Last weekend was spent installing Ubuntu Karmic on my laptop. Because of all the programming stuff I am working on it just made sense even though I am already missing a few of my favourite Windows programs. As soon as I got Netbeans set up I tried running a JavaFX application I had been working on. The stage icons and the images I had loaded in were nowhere to be seen. I gave this a few days to percolate and sat down this evening to sort it out. I started out thinking that it might be a problem with the file paths being different on *nix but a little experimentation showed that paths were not the problem. It took a little reading before I got a reminder; Sun is not the default JVM on Ubuntu! Grrrr.

After switching to Sun Java away from Open-JDK all my images and stage icons were loading happily and my JavaFX app runs just like it did on Windows. Here is the command:

mike@sleepycat:~$ sudo update-alternatives –config java
There are 2 choices for the alternative java (providing /usr/bin/java).

Selection    Path                                      Priority   Status
————————————————————
* 0            /usr/lib/jvm/java-6-openjdk/jre/bin/java   1061      auto mode
1            /usr/lib/jvm/java-6-openjdk/jre/bin/java   1061      manual mode
2            /usr/lib/jvm/java-6-sun/jre/bin/java       63        manual mode

Press enter to keep the current choice[*], or type selection number: 2
update-alternatives: using /usr/lib/jvm/java-6-sun/jre/bin/java to provide /usr/bin/java (java) in manual mode.

Mysql tables – calculating size on disk.

Today I was getting ready to move an application at work over to a staging app that we set up at Heroku. Not wanting to absorb any extra charges for loading up a copy of the entire production database I figured I would empty out the tables that where taking up the most disk space. For that I had to query the information_schema table and add the size of the table to the size of the indexes. All the values are in bytes you have to do a little multiplication to get it displaying in something meaningful to a human like megabytes. Since this is a neat trick that I will likely end up using again I thought I would put it up here as well. Here is the query:

mysql> select table_name, round(((data_length + index_length) / (1024*1024)),2) as “size in megs” from information_schema.tables where table_schema = “myapp_development”;
+———————-+————–+
| table_name           | size in megs |
+———————-+————–+
| messages             |         0.11 |
| organisations        |         0.02 |
| rewards              |         0.02 |
| schema_migrations    |         0.02 |
| selections           |         0.02 |
| senders              |         0.02 |
| sessions             |         0.64 |
| summaries            |        15.52 |
| taggings             |         0.05 |
| tags                 |         0.02 |
| transactions         |         0.03 |
+———————-+————–+
11 rows in set (0.13 sec)

Change the where clause to look for the database you want or remove it completely to see all of them.

Connecting to a web server on a VirtualBox guest.

One of the things I did frequently when using VMware is connect from my host (usually Windows) to my guest (usually Linux). The fact that I don’t really remember how I set that up seems to indicate that it was pretty trivial or just worked “out of the box” (which is a funny thing to say about a VM). After happily using Virtualbox for a while now, the need to connect from host to guest has inevitably reared its head and I was a little surprised that there does not seem to be a straight forward way to do that. Turning as one usually does in such a situation, to Google, and since it was a bit of a fiddle I thought I would scrawl it down here.

The Windows version:

Open the Windows command line and navigate to

C:\Program Files\Sun\VirtualBox>

There are three commands that need to be issued. The command is a little daunting at first glance so here are the important parts:

“karmic” is the name I gave my VM when I created it.

“pcnet” refers to the PCNet virtual network card that I am using in my VM which you can select in your network settings. e1000 is also valid if thats what you’re using.

“railsdev” is the name that will be given to the port forwarding configuration that these commands set up.

The rest should be fairly self explanatory:

C:\Program Files\Sun\VirtualBox>VBoxManage.exe setextradata “karmic” “VBoxInternal/Devices/pcnet/0/LUN#0/Config/railsdev/Protocol” TCP

C:\Program Files\Sun\VirtualBox>VBoxManage.exe setextradata “karmic” “VBoxInternal/Devices/pcnet/0/LUN#0/Config/railsdev/GuestPort” 3000

C:\Program Files\Sun\VirtualBox>VBoxManage.exe setextradata “karmic” “VBoxInternal/Devices/pcnet/0/LUN#0/Config/railsdev/HostPort” 3000

On *nix things are roughly the same, except that the default network card is the Intel Pro/1000 instead of the pcnet you can see above. Consequently you will need to do something like this:

vboxmanage setextradata “mavrick_server” “VBoxInternal/Devices/e1000/0/LUN#0/Config/rails/Protocol” TCP
vboxmanage setextradata “mavrick_server” “VBoxInternal/Devices/e1000/0/LUN#0/Config/rails/GuestPort” 80
vboxmanage setextradata “mavrick_server” “VBoxInternal/Devices/e1000/0/LUN#0/Config/rails/HostPort” 8080

You can see that here I am forwarding port 8080 on the host to port 80 on the guest and naming the forwarding configuration “rails”. Also notice the “e1000” that identifies the network card. Other things to note are that the quotes around the VM name (“mavrick_server” in the above example) MUST be there and they must be regular quotes not angled ones like  “ or ”. Angled quotes will be assumed to be part of the machine name and throw an error like this:

ERROR: Could not find a registered machine named ‘“webserver”’

Replace the quotes with proper ones and you should be good.

Happy forwarding!

Ditch VMware. Don’t look back.

After working in Ubuntu running in VMware for my Ruby on Rails development over the last few months I have come to the realization that VMware is really annoying.

First, I am tired of playing Russian roulette with their poorly chosen keyboard shortcuts. I have inadvertently rebooted the whole VM with a Control+R intended for the Firefox inside the VM more times than I care to admit. Much wailing and gnashing of teeth followed.

Equally poorly planned, but less damaging is their co-opting of the standard undo shortcut Control+Z. The fine folks at VMware decided to use that to suspend the VM which you will eventually discover after flipping between the VM and the host OS and then trying to undo something…

While the fact that switching between the guest and the host OS a few times makes their network connection crash and their seeming inability to make their shared folders work with Ubuntu in any sane way (hopefully fixed now…), both rank on my list of frustrations, the worst by far is the mouse.

I was hoping to get the mouse working better once the VMware tools were installed but that never ended up being the case. For whatever reason after the install I still had to explicitly click in the VM to get it to grab the mouse (or press Control+G… Don’t get me started…) and Control+ALT to release it. I suppose I might have been able to figure out some sort of fix for that had it really caused some acute aggravation, but for the most part it remained as a low level annoyance.

The acute aggravation came from the fact that VMware assumes that anytime you move your mouse anywhere near the top of the screen that you would like to jump out of the VM and access their menu.

Without fail this completely screws up the mouse and I have to try to click several times inside the VM to convince it to grab the mouse again.

Well I am pleased to tell you there is a fix for all of that. Virtualbox. No stupid shortcuts, is actually capable of running compiz-fusion, shared folders that actually work (sudo mount -t vboxsf sharename /mnt/share is all thats needed after you set up your share, exactly what a *nix user would expect), and a single key (the control button on the right side of the keyboard) that releases you from the VM. As a bonus it even seems faster than VMware. The best part is that you don’t have to go trawling on piratebay to get a copy, since it is open source and freely available from their website.

Ditch VMware. Don’t look back.